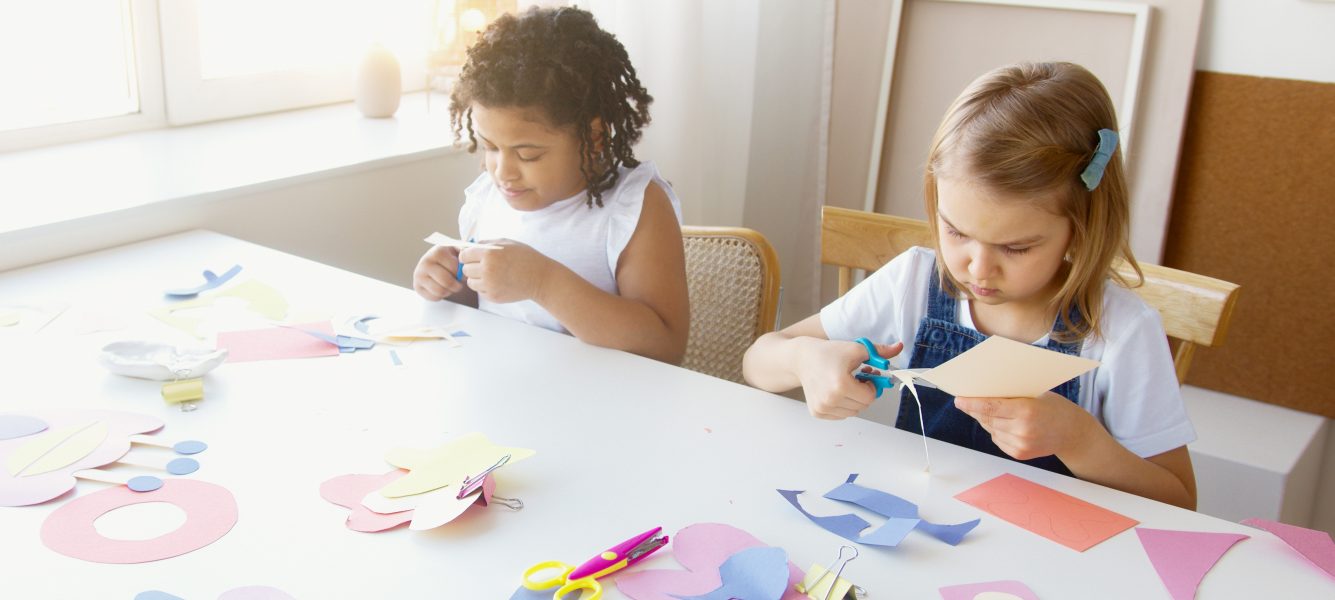
Yes, flowers are nice, and chocolates are sweet, but what really warms the heart on Mother’s Day is a handmade gift by the little ones. Whip out the glitter, the glue, and the paint to help create something wonderful for mum this Mother’s Day. Not only will you show how much you care but you’ll also be allowing the little ones an opportunity to flex their creative imagination, something that is worth its weight in gold.
Discover some inspiration below!
Soft Florals with Coffee Filter
Upcycle used coffee filters into soft decorative florals to decorate your home this Mother’s Day. You can also hide hidden chocolatey treasures within the petals as the centre of each flower – delicious!
You’ll need four to six regular-sized, coffee-stained coffee filters. Submerge each filter in a homemade die concoction of food colouring. You can mix it up by using pastel pinks, baby blues and soft hues of yellow. Stack each flower filter in order form largest to smallest, gluing securely at each layer. Once fully dried, fill the centre with your favourite chocolatey treats!
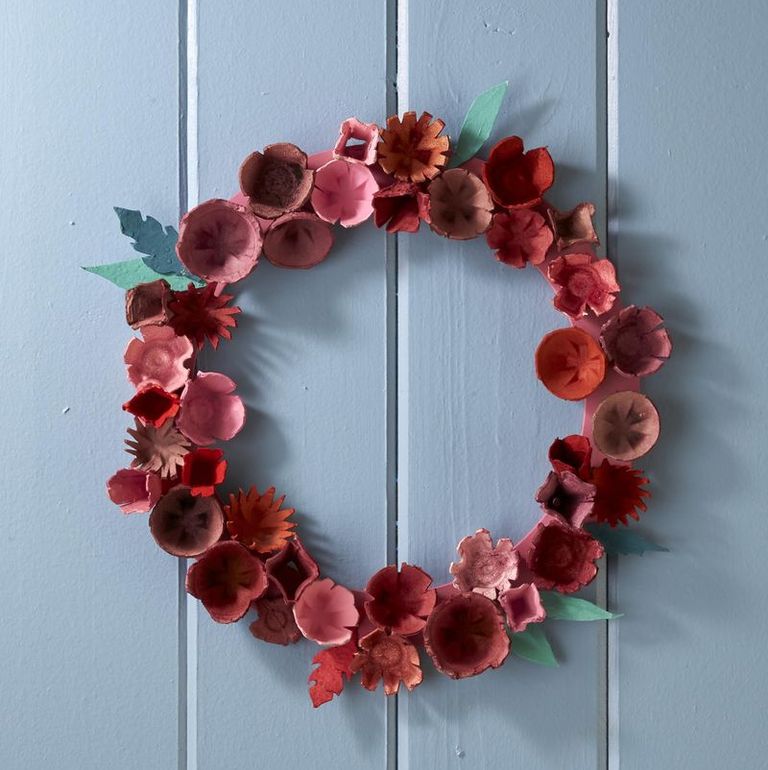
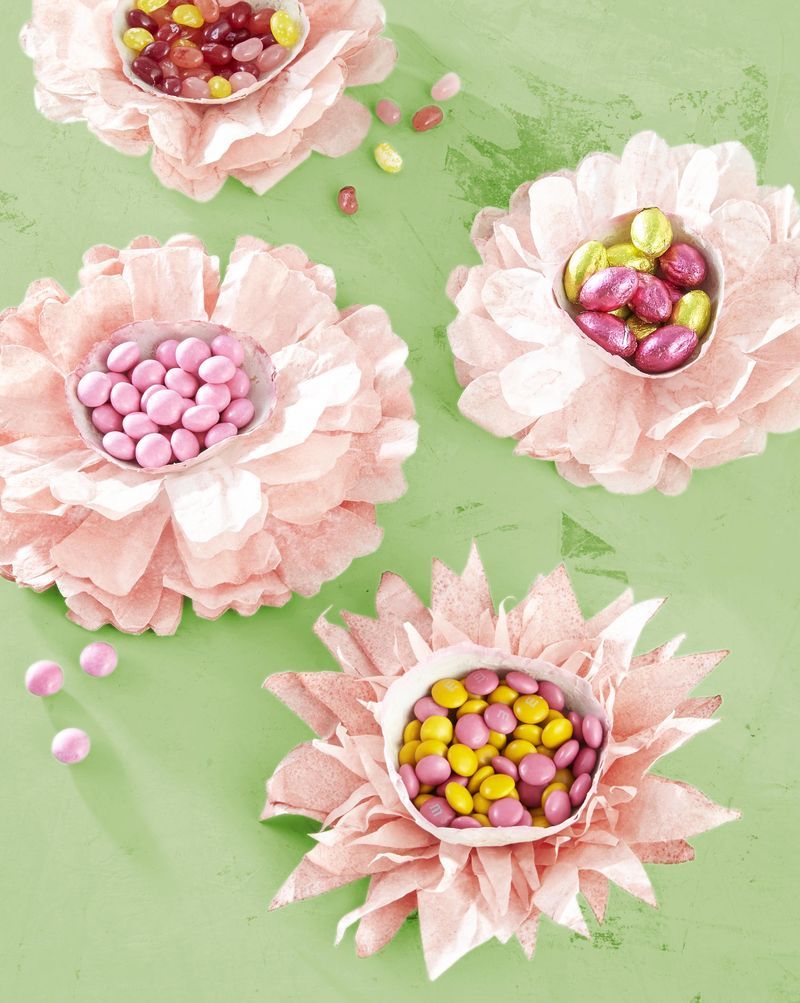
DIY Egg Carton flower Wreath
Transform empty egg cartons into a beautiful floral wreath to create an everlasting bloom that reminds Mum of your love every day, not just on Mother’s Day.
Begin by cutting out individual egg cups from the paper egg carton. You can cut, score and slice each egg cup into a unique floral pattern carefully with scissors. Next, dye each card flower with food colouring, being cardefl not to over saturate. Once dried, add glitter, paint decorations and more to match your creative vision. Attach the egg cup flowers to a craft ring using a hot glue gun, add green paper leaves for a final blooming touch.
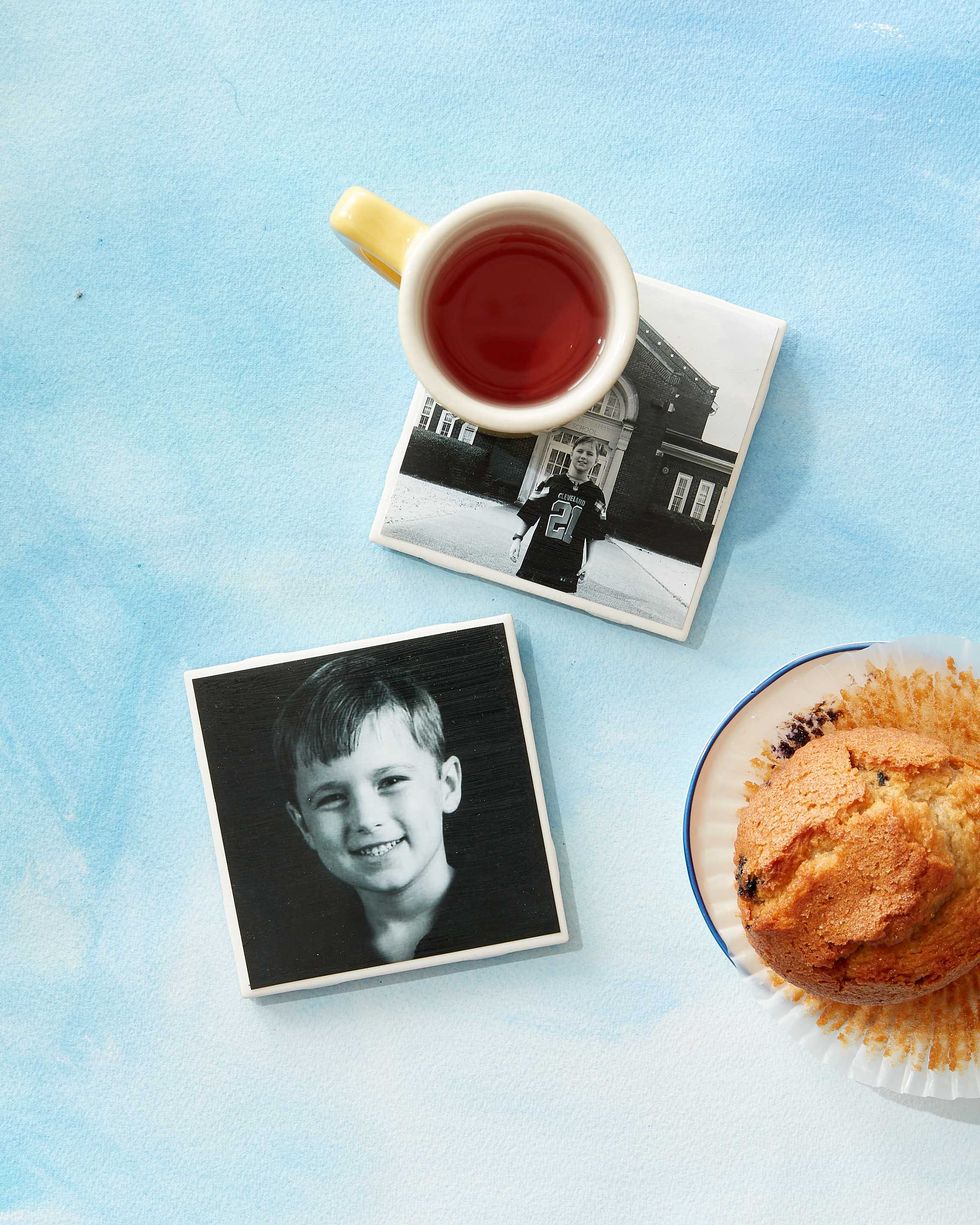
Coasters of memories
Make each cup of tea Mum makes a reminder of the people who love her most with a series of photo coasters! Whilst these look complicated they’re actually incredibly easy once you’ve done one. Begin by printing out your favourite memories of Mum and the rest of the family on card stock paper that is 1/4-inch smaller than a glazed white tile. Brush the back of the photo with glossy Mod Podge (which you can get from most craft stores) and place on the tile, making sure it’s centred. Brush the top of the photo with Mod Podge to seal, allowing to dry completely before using.
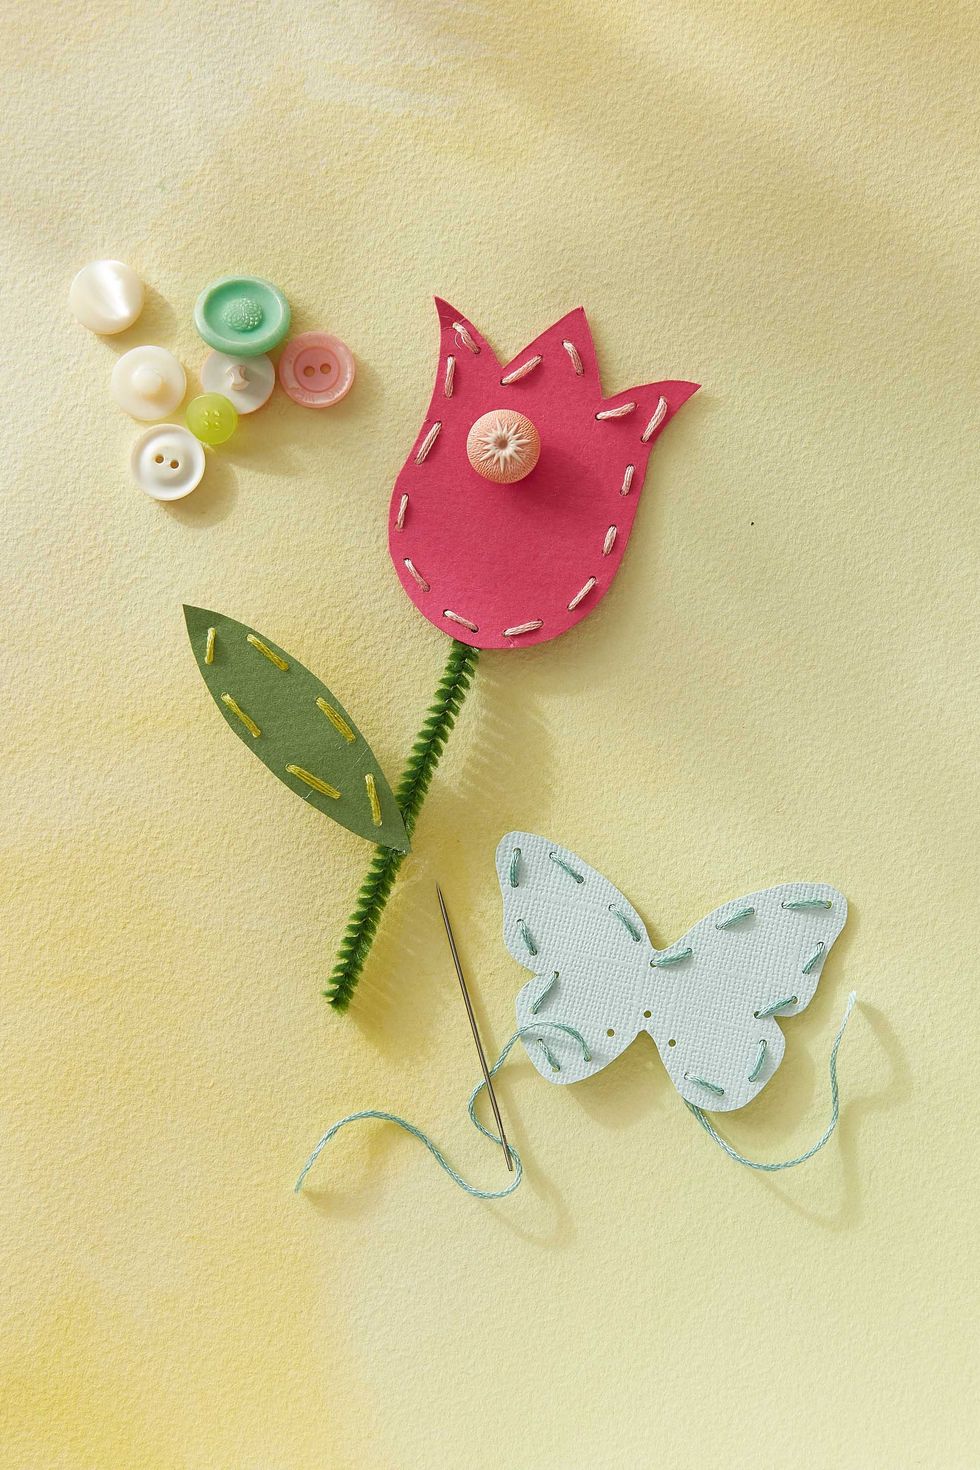
Sweet little stitches
Make this year’s card something special and different with a hand-cut and beautifully stitched card. Start your project by cutting an animal or flower shape from medium to thick craft paper. Punch holes along the border with a small hole punch for your stitches. Carefully stitch along the edges using embroidery floss, thin twine, or yarn. Add additional flare like a pipe cleaner stem, ribbons or even and a button or two!
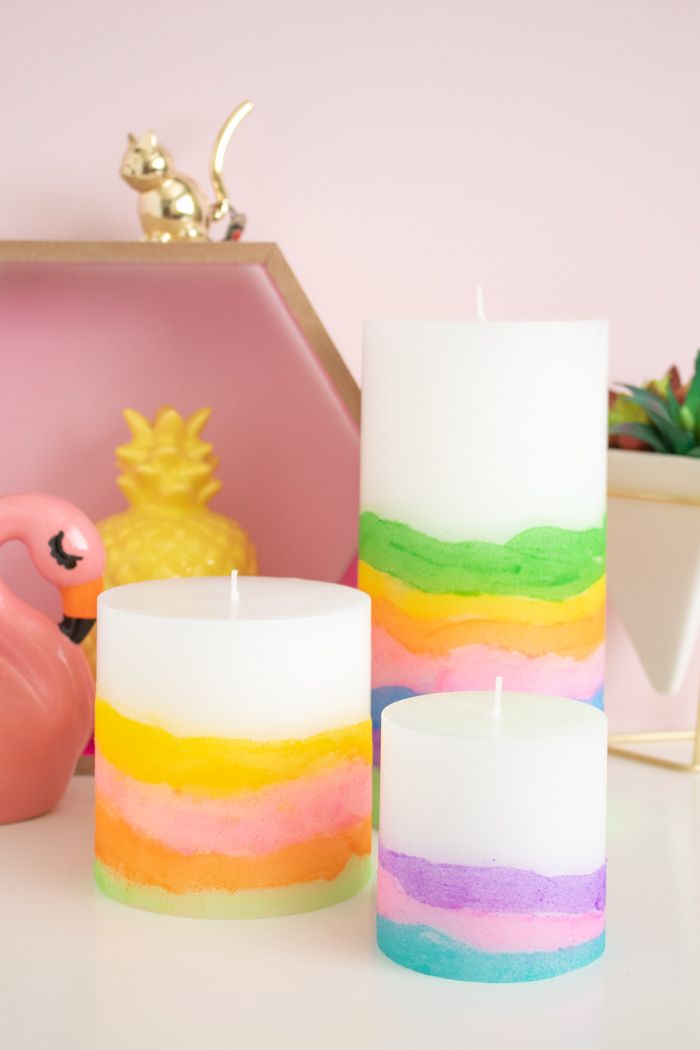
DIY Sand Art Candles
For this one, you’ll need a few white pillar candles, sand art of mixed colours, mod podge and paintbrushes of various sizes. Protect the work surface and catch any loose sand by laying down parchment or newspapers – you’ll thank us later! Apply a thin layer of mod podge to the bottom section of the candle in a wavy line. Pour a small amount of coloured sand along the glued area. Use your fingers to distribute evenly and tap off excess sand onto the paper carefully. Repeat this in layers, changing the colours and alternating in layered thicknesses, until the sand is about 1/2 way up the candle and you have a colourful gradient. Once the glue beneath the sand is dry, apply another layer of Mod Podge on top, sealing the sand. Once fully dried, the candles are ready to display and burn!
Happy Mother’s Day crafting!
Love,
The Front Row Team x